I recently purchased the most lovely dress and coat pattern. It is a 1940 DuBarry 5015 original pattern. Can’t you just see yourself wearing this outfit? So pretty.

What caught my eye were the unusual sleeves and yoke treatment on the dress. Also, the coat pattern is an absolute treat! I will be making the coat at a later date.
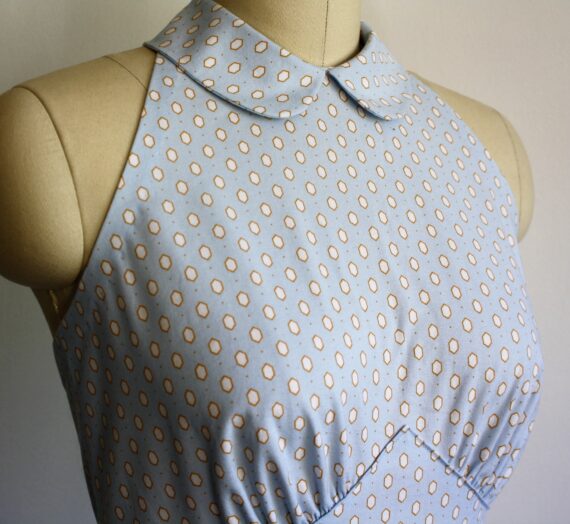
My inspiration for my dress came from this picture:
![b082292db70b663c7374fad89824e262[1]](https://i0.wp.com/www.sewdecadesago.com/wp-content/uploads/2016/03/b082292db70b663c7374fad89824e2621.jpg?resize=400%2C533&ssl=1)
I absolutely love everything about this outfit. The sleeve is unique in its shape and the contrasting piping brings out the color of the stems perfectly.
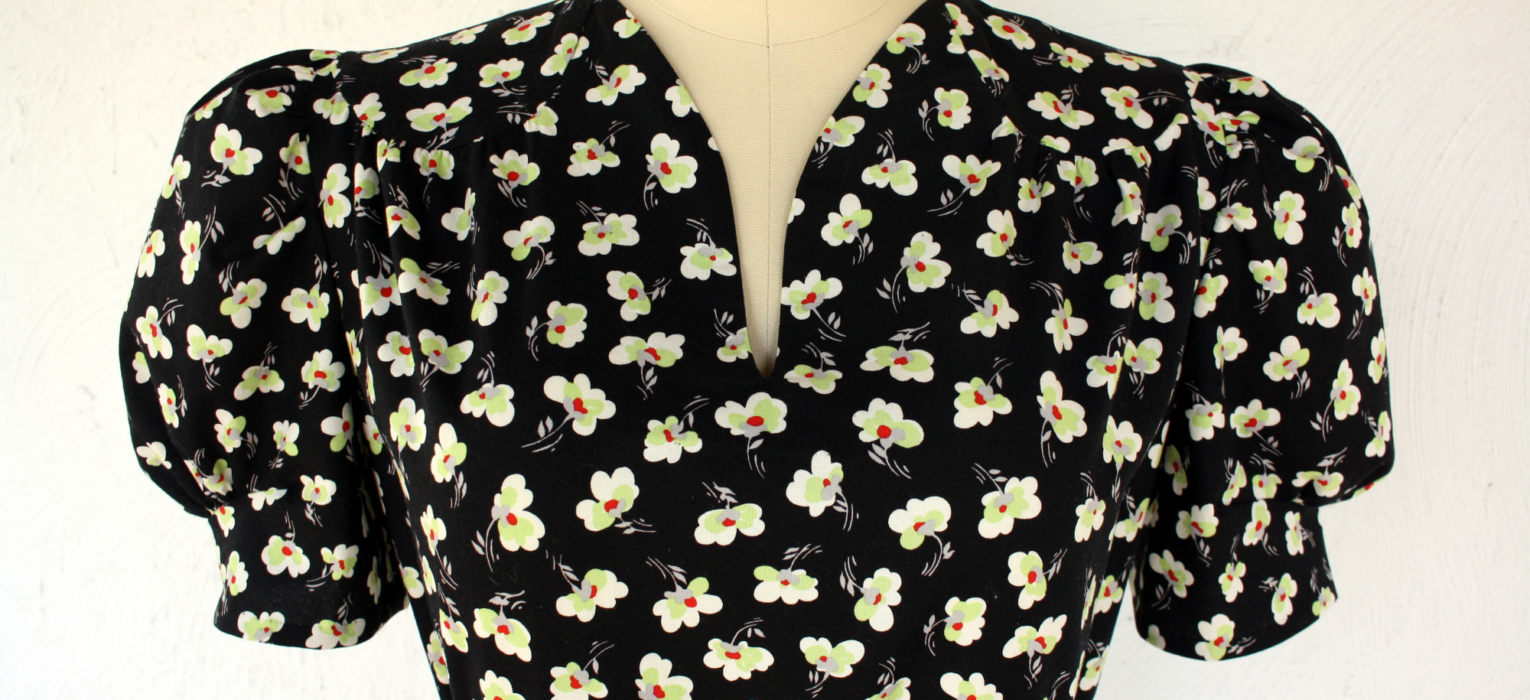
This is the fabric for my project:

This 100% cotton reproduction cotton has a black background with white, gray, apple green and red flowers.
Just like in the original, I wanted to include piping in the seams, which I hand made and applied to the yoke piece.
When I pinned the fronts to the back though, the bodice looked a little too “country”. I ended up getting rid of the piping and proceeded without.
Outside and inside of front piece:


Cut out sleeve:

Inside and outside of sleeve:


Front and back with yoke (the yoke is part of the back piece):

After joining bodice to the skirt, it was time to install the zipper.
A zipper on a 1940’s dress:
- join the skirt to the bodice, but do a loose machine stich in the waist area (the future zipper opening) and press the seams open.
- on the inside, put the closed zipper on top of the seam and baste it into place.
- sew using a zipper foot close to the “teeth”.
- undue the loose stitching and voila! You have a beautiful, invisible zipper.
Here are some pictures of this process:
The pins mark the length of the loose stitches. Left side of the dress picture is the top, the right is the skirt.

Zipper basted in place. (if you trust your abilities, you can use pins instead of basting, but my zipper foot and I are not on the best of terms, and things always shift out of place when just held with pins.)

I sewed the zipper with a zipper foot, close to the “teeth”, all the way around the top and bottom.
After successfully sewing the zipper into place, I turned the dress right side out and carefully cut the loose stitches of the bodice side.

Here is the zipper:

1940’s style belt.
The belt is one piece of fabric folded in half (about 36″ x 3″). I sandwiched interfacing between to stiffen the belt. I love to use original accessories in my garments, so I added a vintage Bakelite slide buckle.

The final touch – thread loops to hold the belt in place. I took a picture of an original dress from my collection:

My handmade belt loops
On each side of the dress waist, I used button hole thread and made two loops about an inch apart.

With the same thread, I began to work buttonhole stiches along these two loops.

I worked them along the entire length of looped threads from one side to the other.
My finished belt loop:

Finished dress:


Jessamyn
How wonderful to see this made up! I just snagged a copy of this pattern (which I am in love with) and it’s fantastic to see the dress executed. I love both your inspiration image and final version. Do you plan to do the coat?
My version of the pattern is missing its instructions. I can, of course, fake it, but I was wondering if you would be willing to sell me a scan or copy of the instructions for a few bucks, or trade for something? I have some button-and-buckle sets of this era, other patterns, etc.
Also, it looks like you don’t do Facebook much, but I just thought you might be interested to know that there is an excellent group formed there just recently, “Vintage Pattern Pieces Lost and Found,” that hasn’t been able to reunite me with these instructions but has had some wonderful successes with other people’s patterns. It’s a nice group of enthusiasts.
SewDecadesAgo
I’m thrilled that you like my dress I will be making the coat at some point – it’s such a wonderful design! You will love working with this pattern – it goes together very nicely, and yes, I would be more than happy to share the directions with you. Let me know how you would like them – the sheet is bigger than a typical copy size, so I’ll need to take it to a copy center, or I can take a picture of both sides and e-mail it to you. Thank you for the Facebook info – I will definitely look into it.
Jessamyn
Oh, thank you so very very much! Yay! A picture of both sides would be great, definitely no need to make this complicated. If you could send it to my name @songsmyth.com, that would be fantastic. Would you like something in return?
I will really be looking forward to seeing what you make of the coat. Your clean aesthetic and obvious dressmaking skills will do it full justice, I’m sure. I’m thinking the dress pattern would make up into some great blouses as well — I might start with that. I love vintage printed cotton skirts for summer, but it’s hard to find tops that are interesting and washable AND not in a colliding print. Clearly I need to make some solid-colored cotton and linen blouses from my vintage patterns.
And yet I’m such a sucker for ’30s and ’40s prints. I love your floral — which also reminds me of popcorn! Ugh, so many projects, so little time.